Frequently asked questions
Do you offer warranty?
Yes, a 1-year from date of purchase manufacturer defect warranty. This excludes consumable parts such as polycarbonate tubes, and ACME screws. We also will not cover damage from electrical or USB port surges, or corruption of the firmware. Full information on our warranty can be found here: https://docs.google.com/document/d/1Z9jx1DyrXjjfqQqdB9YPhhqOt0luRj0OLynrjKcb8s4/
International Shipping
3D Potter ships worldwide. If you are outside of the United States or if you don’t see a dealer in your area, please email us at: zaneta@3dpotter.com so we can get you a quote on shipping. We do not accept Purchase Orders outside of the United States.
Getting Started, Machine Setup and Operation
Version 10 Assembly Video: https://www.youtube.com/watch?v=zAXeDTTHlOQ
Version 10 Operation: https://www.youtube.com/watch?v=qlKjVaMu0mQ
Version 10 Files: https://drive.google.com/drive/folders/1Z75URXSYHz8LaEkh--1E-EALXg_C-xrJ
Scara Assembly Video: https://youtu.be/UsdfftpnCfE
Scara Roadrunner Assembly: https://youtu.be/vNbSFMzCWZw
Scara Operation: https://www.youtube.com/watch?v=4PYLPpY49uM
Scara Files: https://drive.google.com/drive/folders/1bgKKFmiLAjO996ld0stOVZXU9AWedp51
All other printers: https://3dpotter.com/faq-v789
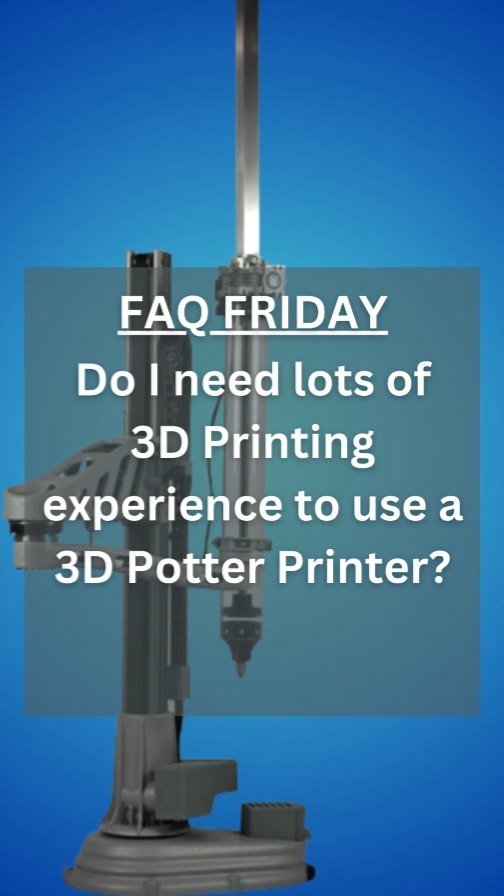
Do I need 3D printer or pottery experience to use a 3D potter Printer?
You do not need previous experience, but it helps. 3D Potter ceramic printers work like standard 3D printers. 3D printers read g-code files, which must be generated by a slicing program, which then is fed a model file. If you do not have 3D printing experience, you will need to learn model file generation as well as slicing software operations. There are many videos available on YouTube that will teach you how to use 3D printers, slicing, and model generation.
Clay and its preparation is another part of using our printers. There are many factors that can affect the properties of clay and having the right consistency is key. Clay that is too hard or too soft can cause issues with our extruder system. We have YouTube videos on clay preparation. Have fun and be prepared to get dirty.
Clay preparation
1. Cut clay into smaller sections, put in microfiber towel or felt in the plastic bag, and 10-15 oz. of water, close the bag. The moisture from the cloth will penetrate into the clay in about a day or so.
2. Manual wedging with adding extra water until the consistency is right.
3. Use a pug mill and add small amounts of water while cycling the clay through the pug mill several times to get the right consistency. Then the tubes can be loaded directly from the pug mill.
Some Clay Recommendations and Observations
Clay - Laguna B-Mix 5 WC401. You can get it in prepared bags and use our preparation method.
Stoneware - Maccabees cone 5 stoneware has the best interlayer adhesion and is quite easily extruded in our extruders. We do add some water to the stoneware which seems to help with interlayer adhesion and ease of extrusion.
Earthenware - Vince's Low White Clay earthenware performs well also although it does not extrude as easily as the stoneware. The interlayer adhesion is a little bit less than the stoneware also but this doesn't seem to be a problem as long as you do not let the moisture come out of the clay too fast after printing.
Porcelain - Axner Mary's Porcelain Clay is the only porcelain that we have experimented with. The interlayer adhesion seems to be a problem as the moisture dissipates too quickly on a large print. Especially on larger vessels at the overlap point after a period of time, the moisture doesn't seem to be there. This also depends on the environment's temperature and humidity.
There's so much to say and so much experimenting to be done in our 3D ceramic studio. We have yet to make up our own clay preparation and this is another way to go.


Ready to Print Clay - Sio-2 has premade bagged clay, with the correct amount of water content, ready to print out of the bag. For more information please visit their website. https://www.sio-2.com/gb/content/20-3d-printing-clays-sio-2
Loading Extruder Tubes
The Pugmill
The easiest way to load extruder tubes is with a pugill. For best results, a de-airing pug mill and a double auger will give you better performance than a single auger. Although a single auger is adequate, the consistency of the clay is more critical when it comes to loading the tubes. The consistency of the clay should be similar to standard throwing clay, but wetter. This can be accomplished by running the clay through the pug mill and adding a small quantity of water. If too much water is added to the clay the pug mill can actually not function sufficiently enough to load the tubes. This happens because the auger has no traction against the side of the pug mill as the clay mixture becomes too loose. It also depends on the pug mill and its ability to forcefully push the clay. It is necessary to have an adaptor for the nozzle of the pug mill to attach the polycarbonate tube for loading.
https://www.youtube.com/watch?v=YtHcdhgxBe8
Loading by hand
Using a 25 lb. bag of prepared clay, cut the clay into 4 pieces and put a microfiber towel in between the 4 pieces. Add 15 ounces of water to the bag, close the bag and make it airtight. Wait until the water has penetrated the clay, approximately one to two days. Now using the moist clay roll it into a cylinder a little bit smaller than the inside of the tube you are loading. Put the nozzle on the tube with tape over the end and gently tap the clay into the tube. Make sure to tap the tube and nozzle on a soft surface. This is the best method to load your tubes without a pug mill.
https://www.youtube.com/watch?v=EbGbvmyD0-U
Trowel
Using a trowel or a spatula on a flat surface. Scoop clay into the tube then tap the tube on a soft surface. This will move the clay down into the tube as you continue to load the tube. If the consistency of the clay is correct, you can eliminate the air at the same time. This is the hardest loading method.
Changing tubes on the extruder
Changing out an empty tube on an extruder for a full one has many steps. Please watch our Extruder Tube Changing video for a full tutorial on how to easily change your tubes.
How do I create an object?
Basic object creation and slicing tutorial: https://www.youtube.com/watch?v=umOpoPM2Asc
In order to create an object you must first develop a shape. There are some simple programs like, Tinkercad, but our favorite is Fusion 360 which is free for students and small businesses. These software programs are capable of just taking simple shapes and turning them into very attractive objects to print on our ceramic printer.
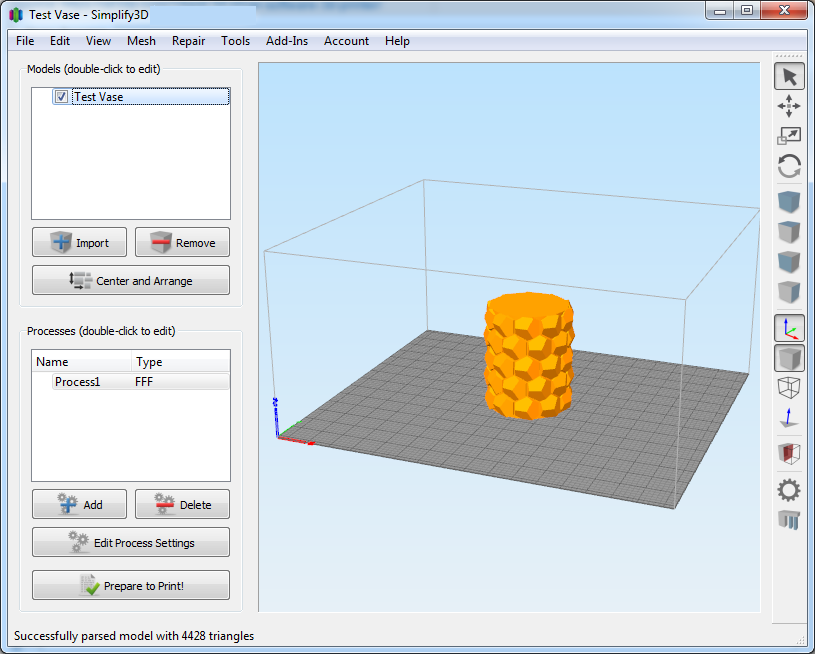
After you've generated your vessel, it's a simple process with Fusion 360 or any other program to turn it into STL file. From the STL file the program needs to be sliced and processed into g-code. This process has become very simple over time with multiple free programs like Repetier, Cura, and Simplify 3D which is $150 but has some very good features and visualizations.
Once you slice your object and set the parameters for the printer, it automatically generates the G code. This G code can be saved to an SD card and inserted or uploaded into the machine.
After loading the SD card, it's a simple process of pushing two or three buttons and your print will start. From the touchscreen you have full control over the speed and ceramic flow again so that you're capable of fine tuning the print even while it's in process. For our wireless design, you can view all of your files and select which file you want to print.
3D Potter recommends Cura as one of the best Slicers to be used with our printers. It is free and we provide the profile for it which imports all of the settings of our printers.
Next would be Simplify 3D, which we provide profiles for as well. You can use any slicer as long as you enter the settings.

STL File Examples
Here are some sample STL files for you to slice: https://drive.google.com/drive/folders/17zsPQ30Nu3Nb-sH_Wu8yo3gBNibHl6CU
Slicing the test files: https://www.youtube.com/watch?v=_KuHgqOmZog
It is very important that you experiment and get your slicing settings correct. Here are some tips and tricks for theses STL files. Be sure to change the object size and rotation in the slicer to fit how you want it to be.
Basic.stl- This solid core shape can be sliced with almost any setting and nozzle size. Feel free to change its dimensions or size in the slicer.
Snowflake.stl- This shell can be sliced with our settings, just like the Basic.stl file, it is quite flexible and generally slices very well.
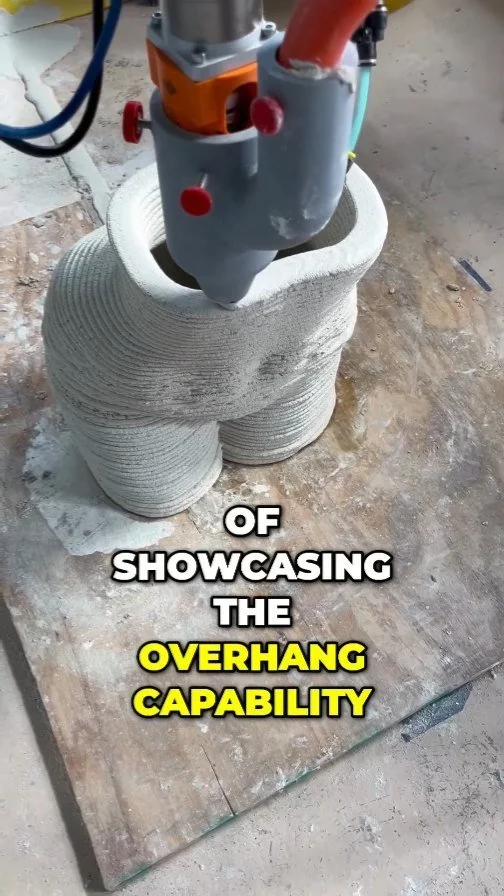
Loops.stl- This is a more advanced object. Adding pegs sticking out creates a “loop” effect while printing. It is important to know that slicers can not print objects that are smaller than the nozzle size. One way of getting around then is using a 3mm nozzle size setting in the slicer, even if you have a 5mm or 6mm nozzle on the printer. This will cause under extrusion, so you must increase the extrusion multiplier/flow rate in the slicer, or the extrude rate in the printer interface when the print is running.
Simplify 3D factory settings
These files are Simplify 3D factory setting. The real advantage with Simplify factory settings is that not only does it include the STL file, but it also includes all of the settings and parameters of the slicing program and options. So for our customers that have Simplify 3D it's as simple as double-clicking on one of these files, Simplify 3D will automatically launch and all you have to do is generate the G-Code. All of these files have been tested on our machines here at our shop. You might have to adjust your speeds and feeds but probably only slightly for your clay consistency. If you do not use Simplify 3D, there are screen shots of the settings as well, such as printing speed in millimeters per second.
For the Scara printers, you can check the available print area with these STL files in your slicer: https://drive.google.com/drive/folders/1sh5uIvRODUoRM8zlUXEvVp5Gc3oFGE9g
Simplify 3D .FFF files (Model 7 and 8)
This is a BETA profile for our version 7 and 8 printers. Default flow rate is 500%. Flow rate may need to be adjusted +/- 100%.
Simplify 3D .FFF files (Model 9 and Scara)
9 Micro.FFF: Micro 9
9 Standard.FFF: 9, Pro 9, Super 9
9 XL.FFF: XL 9, XXL 9
SCARA 5mm 4-10.FFF: Scara Series
Simplify 3D .FFF files (Model 10)
10 Micro.FFF: Micro 10
10 PRO.FFF: 10 Pro
10 Super.FFF: 10 Super
10 XL.FFF: 10 XL- using bat placed on top
Cura settings
3D Potter now supports Cura. Download the profile for your size printer and open it with Cura, all settings will be imported. You can also install the Duet plugin and upload/print to your printer directly (not required). To install the plugin you can use the Cura marketplace or manually from the link below.
For the Scara printers, you can check the available print area with these STL files in your slicer: https://drive.google.com/drive/folders/1sh5uIvRODUoRM8zlUXEvVp5Gc3oFGE9g
Installation tutorial: https://www.youtube.com/watch?v=uZty0JzH41E (4min)
Cura Settings (Model 7 and 8) BETA Profile, Touch screen
Cura Settings (Models 9 and Sara), WiFi
3D Potter Micro.3MF: Micro 9
3D Potter Standard.3MF: 9, Pro 9, Super 9
3D Potter XL.3MF: XL 9, XXL 9
3D Potter Scara.3MF: Scara Series
Cura Settings (Model 10), WiFi
3D Potter 10 Micro.3mf: Micro 10
3D Potter 10 PRO: Pro 10
3D Potter Super 10: Super 10
3D Potter 10 XL 15in Bat: XL 10- using included bat
3D Potter 10 XL Full Range: XL 10- using bat placed on top
3D Potter 10 XL Auger 15in Bat: XL 10 Auger- using included bat
3D Potter 10 XL Auger Full Range: XL 10 Auger- using bat placed on top
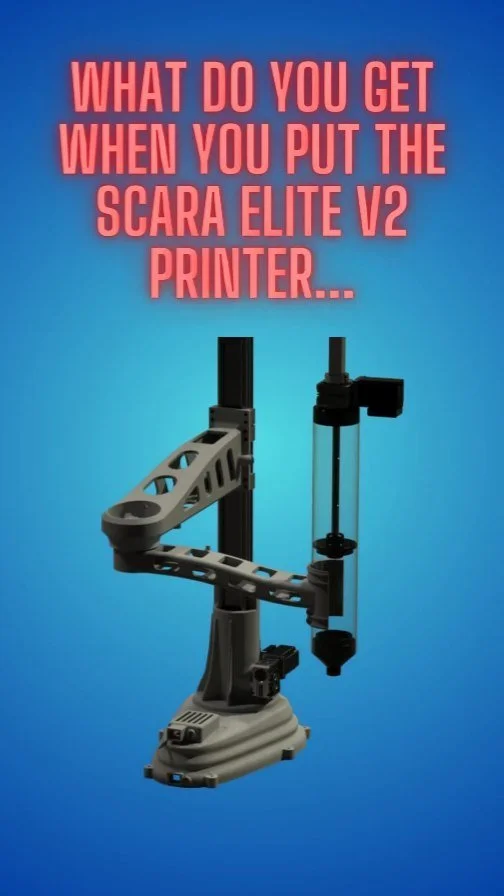
3D Potter Scara
3D Potter Scara Elite Extended
(Optional) Duet plugin for Cura: https://github.com/Kriechi/Cura-DuetRRFPlugin
Retraction
3D Potter printers, and extruders, are fully capable of retraction in between parts of an object. This is achieved by high reverse speeds of the piston in our extruders. Below are the settings which we recommend for ideal retraction use clay.
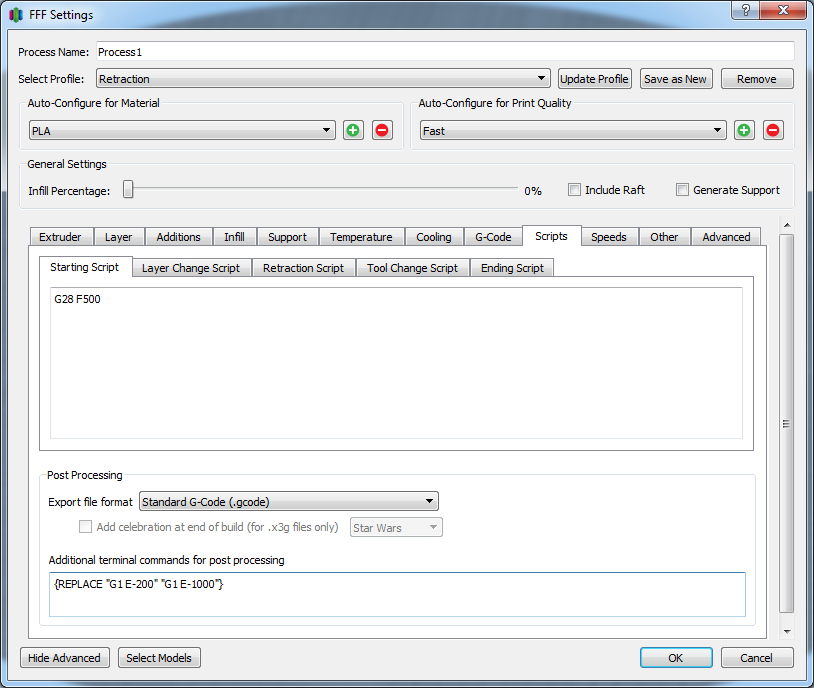
Retraction Distance: 1000mm
Extra Restart Distance: -10mm
Retraction Vertical Lift: 5mm
Retraction Speed: 1000mm/s
Coast: 5mm
Wipe: None
You can enter these setting directly into Cura or other slicers.
Simplify 3D’s maximum retraction distance is 200mm. In the process settings window you must add a terminal command under post processing which is under the Scripts tab.
{REPLACE "G1 E-200" "G1 E-1000"}
Explanation:
We need the extruder to retract very quickly a certain amount, so we set it to retract an arbitrary distance of “1000mm.” In reality, the piston does not move up a whole meter because it has a gearbox and acme screw reduction. Right after a layer finishes in Simplfy 3D, it resets the extruder value “E” to 0. With the retraction set to -1000mm, it sends the command E-1000. Think of this as a position on a number line. After moving up 5mm and moving to the next location, it sends the command E-10. This moves it from position -1000 to -10, which reprimes the extruder. “E” is then reset to 0 again, and the next layer starts.
This is how Simplfy 3D deals with retraction, other slicing software work differently and may not need the post processing script, or may use different punctuation for scripts.
Extruder Diagram


Z Height change for version 9 and 10 printers
To change the height on version 9 and 10 printers, you only have to change the maximum Z travel distance in the config. Please watch our tutorial video for the full instructions.
https://www.youtube.com/watch?v=oyzKJ2o4D1s&t
SETTINGS THE Z TRAVEL DISTANCE BEYOND ITS MAXIMUM VALUE WILL CRASH THE MACHINE AND VOID THE WARRANTY. CRASHING THE MACHINE CAN CAUSE PERMANENT DAMAGE.
Wifi Networking
All 3D potter printers broadcast their own WiFi network to connect to. Here is a guide on basic connection: https://www.youtube.com/watch?v=5__oClYqolI
The Scara and version 9/10 printers can be connected to in multiple ways. It can connect to a WiFi network, or generate its own, thus becoming its own router. When programming the WiFi to connect to an existing network (or to generate its own), the exact name and password of the wifi network it is connecting to (or generating) must be entered as a command, this is a one time event. When it powers up it runs through all of the commands in config file located in the sys folder. One of these commands is to tell the machine to connect to a network (M552 S1) or to generate its own network (M552 S2), this must be changed to what suits your needs.
3D Potter WiFi Network Connection Guide: https://www.youtube.com/watch?v=NysPeo8uz0g
WiFi programming guide:
https://docs.google.com/document/d/1vq9BJCUo9UxAJmw9oulXlpTHEubVVADhHvjnmOfZuP8/edit
https://duet3d.dozuki.com/Wiki/Gcode#Section_M587_Add_WiFi_host_network_to_remembered_list_or_list_remembered_networks
https://duet3d.dozuki.com/Wiki/Gcode#Section_M589_Configure_access_point_parameters
Connecting to the board via USB: https://docs.duet3d.com/en/How_to_guides/Getting_connected/Getting_connected_to_your_Duet
USB drivers: https://github.com/Duet3D/RepRapFirmware/blob/dev/Driver/WindowsDriverFiles.zip
YAT terminal: https://sourceforge.net/projects/y-a-terminal/
Ethernet Networking
As an optional add-on to all of our printers, you can choose to have a non-WiFi model. This will make the printer have no WiFi module, and instead have an extra daughter board for Ethernet, perfect for facilities with WiFi restrictions.
Video Guide: https://www.youtube.com/watch?v=fOkYZ5CNznA
Here is our manual on how to connect over Ethernet: https://docs.google.com/document/d/1hHrO7o_VC6m9qFqECqpWe7MxdM75YOUvm3MBIaY1gSU/edit
What lubricants are used with the machine?
On the main ACME screw use Lithium Grease, White. It can be purchased at most hardware stores and the Home Depot
https://youtu.be/wWvMl37TE4s?t=283
https://www.homedepot.com/p/Lucas-Oil-8-oz-Lithium-Grease-White-10533/202535870
On version 7,8,9 the printer rails have a very light coat of cleaner wax on them, make sure that not too much is applied. You should not be able too see any lumps on the rails, only a very thin sheen of reflecting light when viewed at an angle. Can be purchased at car parts stores and online.
https://www.youtube.com/watch?v=HbQcMEKAvRo
https://www.amazon.com/dp/B0002U1TVW/ref=twister_B00ODVQYE8?_encoding=UTF8&th=1
For version 10 printers use a few drops of 3-in-one oil, this lubricates the whole rail for a few months. If the rail has debris on it, be sure to remove them and then use a few drops on the cleaned section of the rail to re-lubricate it. 3-in-one is sold at most hardware stores.
https://www.youtube.com/watch?v=EhxjFMZ66GM
https://www.amazon.com/3-ONE-10038-Multi-Purpose-Pack/dp/B00065VGWK/
https://www.harborfreight.com/4-oz-multi-purpose-oil-with-marksman-spout-61495.html
https://www.walmart.com/ip/3-IN-ONE-Multi-Purpose-Oil-with-Marksman-Spout-4-OZ/26394959
Cover Files for Version 10
Linear ram extruders with robotic arms
In order to drive the linear Ram stepper motor, you will have to supply the ENGAGE, STEP, and DIRECT signals at 3 amps (these are typical stepper motor requirements).
The stepper motor we use requires ~2.7 amps so plan accordingly if you're going to supply this directly from your equipment.
If you decide to drive your RAM remotely with hose, please be advised that we supply a hose adapter kit ($175). This kit comes with 24 inches of flexible high pressure clear hose. Please follow the recommended clay consistency when using the hose assembly. If your clay is too thick you will damage the hose assembly and/or the ram. This is a disadvantage of using a hose assembly or compressed air and auger arrangement. Your clay has to be considerately thinner in order for the pressure to remain relatively low. This is again why we recommend direct nozzle extrusion because you are able to extrude a much thicker clay and achieve much larger vessels faster and without the disadvantages of thin clay mixtures.
Control Over USB
Version 9, 10, and Scara Printers
You can control the printer over USB using a slicing interface such as Simplify 3D. (Other slicers may not have this functionality). Controlling a printer over USB circumvents the Duet web interface. Generally, a slicer is injecting g-code line by line in a livestream over USB when using this method. This means the slicer is in full control of the printer over USB, and the printer does not even have the file on it.

It is VERY IMPORTANT that your printer and computer are plugged into the same power source, preferably a power strip. If you have old or incorrect wiring in your building, plugging the printer into one outlet and the computer into a different one could complete a circuit once you plug in the USB cable. This will cause PERMANENT DAMAGE to your computer and the printer. This is caused by a power outlet’s ground and neutral wiring being swapped. On 120V 60Hz AC, devices still work normally if the ground and neutral wiring is swapped. However if you plug your computer into a correctly wired outlet and the printer into an incorrectly wired outlet, or vise-versa; when you connect a USB cable between them it can complete a 60v circuit which will fry them. This is not covered under our warranty.
You may need to install the Duet USB driver to use this functionality depending on what type of computer you are using. YAT is not needed for control over USB, just possibly the drivers. https://duet3d.dozuki.com/Guide/1.)+Getting+Connected+to+your+Duet/7
My extruder is making a bit of a grinding noise
The sound you are experiencing is most likely the stepper motor stalling. There are several reasons this could happen.
1. There is not enough lubrication on the screw and/or the anti-rotator nut that moves up and down the square tube (this is likely).
2. The clay is too hard, not allowing the motor to overcome to force needed to push it out through the nozzle, or there is a blockage in the nozzle (this is likely).
3. The piston is jammed in the cylinder (this is unlikely).
4. The gearbox is jammed, or the motor is defective (this is highly unlikely).
Unable to extrude the last .25" to .5" of clay in the Ram
We also get about 1/4-1/2 inch (~6-12mm) or so of harder clay remaining at the end of the clay cartridge. This can be from clay being exposed to air in the tube, causing it to dry out faster than clay in the middle of the tube. The ACME screw can also be a cause of this problem on our longer tubes. It is possible that the screw could of been bent slightly, causing a deviation from being straight the more it is extended due to clay that is too hard.
Version 10 updates
With the launch of our version 10 printers, updated system files are available for improved performance.
Upgrading from version 10.0 to version 10.1 requires removal of epoxy on parts of the printer, as well as uploading of files to the printer. Please contact our tech support department for specific instructions on how to preform this update.
Upgrading from version 10.1 to version 10.2 only requires uploading of files through the printer interface. Only the config and homing files are updated.
Version 10.1 patch notes: Improved speed on all rails. Improved interface response time. Improved homing and test files.
Version 10.2 patch notes: Fixed inverted prints from what is displayed in slicing software.
Version 10.3 patch notes: Cosmetic changes to plastic covers
You can check what version printer you are on by viewing the printer’s configuration file.
Return Policy
Copyright Information
All 3D potter content (on all of of our social media platforms and this website) is under a Creative Commons license. Under the Creative Commons Attribution license, commonly abbreviated as CC or CC-BY, you are free: to Share — to copy, distribute and transmit the work. to Remix — to adapt the work.
While we do not require BY to be apart of content that is Reused/Shared/Remixed, it is only our preference. BY referes to mentioning 3D Potter, giving us credit in the the content that is Reused/Shared/Remixed.